
Take a close look at the perimeter of your bathtub or shower floor. Is the rubbery seal cracking, peeling away from the tile, or dotted with stubborn black mildew that refuses to scrub off? If so, your bathroom’s first line of defense against water damage has failed.
Caulk is the waterproof sealant that fills the joints where different materials meet—like where your porcelain tub hits your ceramic tile wall. When caulk fails, water seeps behind the walls and under the floor, leading to catastrophic wood rot and mold growth in your subfloor. At Jazz Construction Group, we have executed massive bathroom gut-remodels that were entirely caused by a failed $8 tube of caulk.
The good news? Recaulking your tub is one of the easiest, highest-ROI DIY projects you can tackle in a single afternoon. Skip the handyman fees. Here is our professional guide to getting a perfect, watertight seal every time.
The DIY Toolkit: What You Need
Do not attempt this project with just your thumb and a prayer. For a professional-looking, long-lasting seal, gather these inexpensive supplies:
- 100% Silicone Kitchen & Bath Caulk: Do not buy acrylic latex. You must use 100% silicone for areas constantly exposed to standing water. Ensure it says “Mold/Mildew Resistant.”
- Caulk Gun: A standard, drip-free caulk gun.
- Caulk Removal Tool & Utility Knife: To scrape out the old material.
- Rubbing Alcohol or Bleach: For surface prep and mold killing.
- Painter’s Tape (Blue Tape): The secret weapon for perfect lines.
- Caulk Smoothing Tool (or a cup of water/soapy water): To finish the bead.
Step 1: The Golden Rule—Remove the Old Caulk
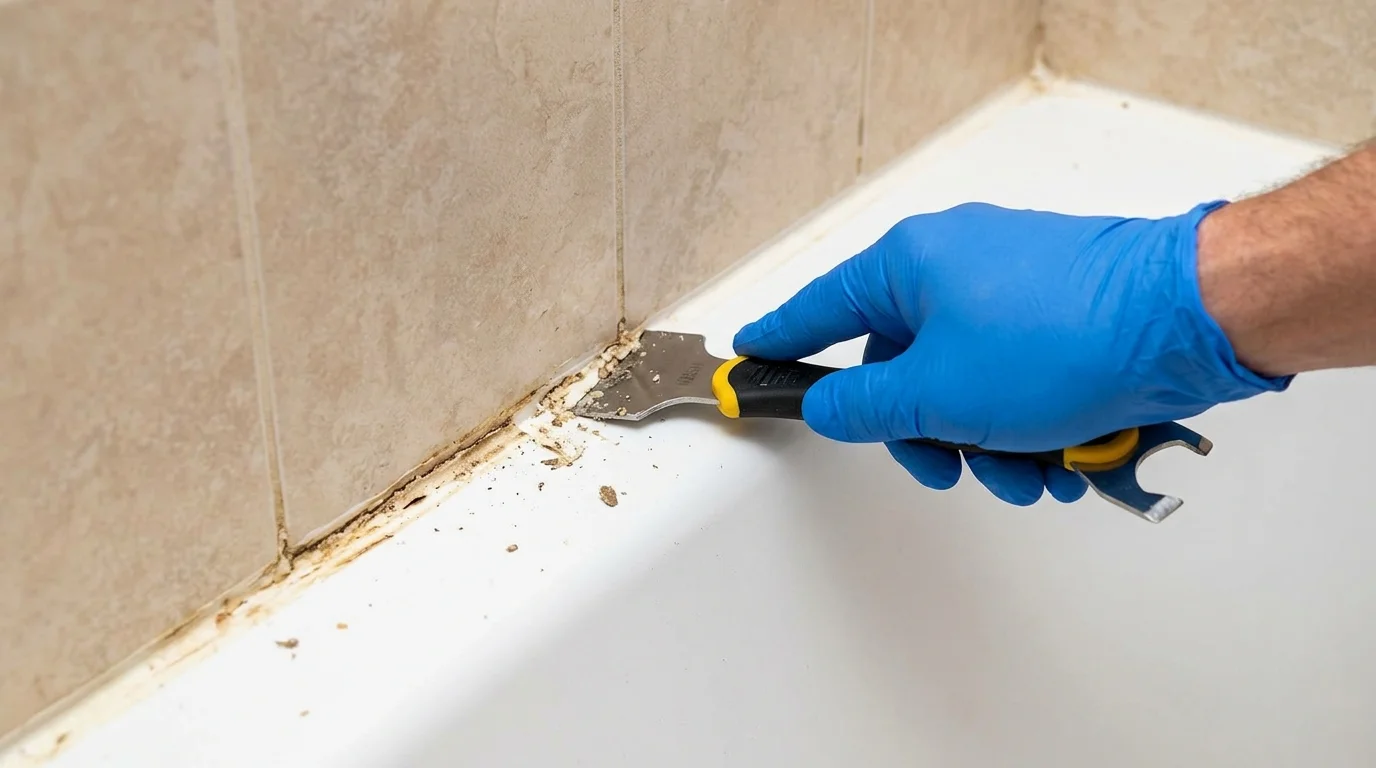
The absolute biggest mistake DIYers make is applying new caulk directly over old, cracked caulk. New silicone will not bond to old silicone. It will simply peel off in a matter of weeks.
How to Remove It:
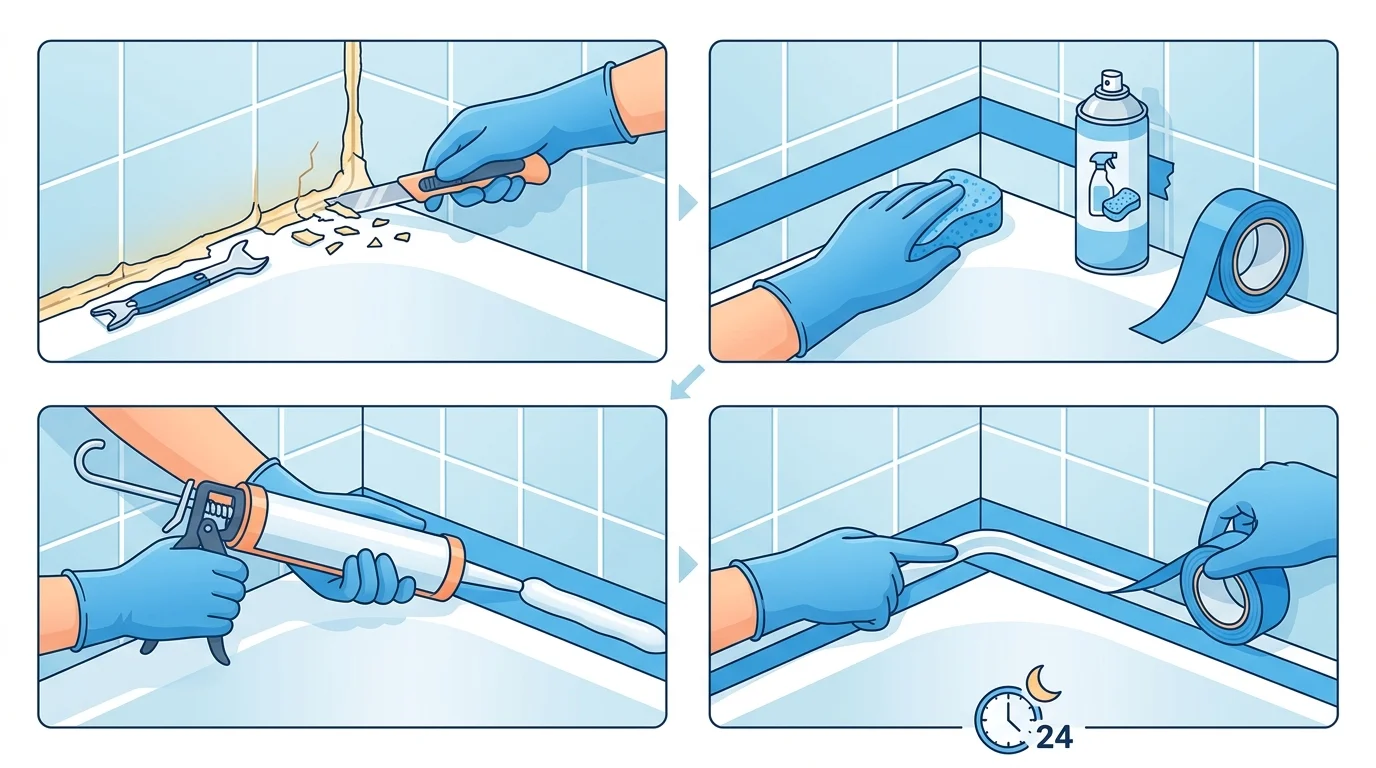
Use your utility knife to carefully cut along both the top and bottom edges of the old caulk line. Take a rigid caulk removal tool (or a stiff putty knife) and scrape the joint until every single bit of the old sealant is gone. If the old caulk is incredibly stubborn, apply a chemical caulk remover gel, let it sit for two hours, and scrape again.
Step 2: Clean, Kill Mold, and Dry
Even if you scraped out all the caulk, microscopic mold spores and soap scum are still hiding in that joint. If you seal over them, the mold will simply grow behind your new transparent caulk.
Scrub the entire joint with a bleach solution or a strong bathroom cleaner. Once clean, wipe the joint down with rubbing alcohol. The alcohol removes any lingering soap residue and evaporates quickly. The joint must be 100% bone dry before proceeding. If you need to, use a hair dryer to blast the moisture out of the crack.
Step 3: Tape the Edges (The Professional Secret)
If you have ever tried to caulk freehand and ended up with a massive, smeared mess all over your tiles, this step changes everything.
Run a strip of blue painter’s tape along the wall tile, leaving exactly a 1/8-inch to 1/4-inch gap above the joint. Run a second strip of tape along the tub deck, leaving the same gap below the joint. You have now created a perfect stencil. Any mess you make will end up on the tape, not your porcelain.
Step 4: Apply the Bead of Silicone
Cut the tip of your caulk tube at a 45-degree angle. Make the opening small—about the size of a standard nail head. You can always cut it larger if needed, but you can’t make it smaller.
- Load the tube into the caulk gun and puncture the inner foil seal.
- Hold the gun at a 45-degree angle to the joint.
- Apply steady pressure to the trigger and pull the gun toward you in a smooth, continuous motion.
- Don’t worry if it looks a little thick or uneven right now; the tape will protect your tub.
Step 5: Tool the Joint and Pull the Tape
100% silicone is incredibly sticky and doesn’t clean up with water like acrylic caulk does. To smooth (or “tool”) the bead without it sticking to your finger, dip your finger in a cup of water mixed with a few drops of dish soap.
The Finishing Touch:
Run your soapy finger lightly over the caulk bead in one continuous motion to press it deeply into the joint and smooth the surface. Wipe excess caulk off your finger onto a paper towel.
Crucial Step: Immediately remove the painter’s tape while the caulk is still wet! Pull the tape away at a sharp angle. If you wait for the silicone to dry, peeling the tape will rip your new caulk right out of the wall.
Choosing the Right Caulk for the Job
| Caulk Type | Best Used For | Pros & Cons |
|---|---|---|
| 100% Silicone | Showers, Bathtubs, Sinks | Pros: Completely waterproof, highly flexible, won’t shrink or crack. Cons: Cannot be painted, messy to clean up without mineral spirits. |
| Acrylic Latex (Painter’s Caulk) | Baseboards, Crown Molding, Drywall Corners | Pros: Easy water cleanup, paintable within 30 mins. Cons: Will break down and mold if exposed to constant standing water. |
| Siliconized Acrylic | Kitchen Backsplashes, Window Trim | Pros: Paintable but offers better water resistance than pure acrylic. Cons: Not durable enough for the inside of a shower enclosure. |
Frequently Asked Questions
How long do I need to wait before taking a shower?
Read the tube carefully. Most standard 100% silicone caulks require 24 hours to fully cure before they can be exposed to water. However, some “fast-cure” formulas claim to be water-ready in 30 to 60 minutes. When in doubt, give it a full day to guarantee the seal.
Why is my existing caulk turning black?
That black spotting is mold growing beneath the surface of the caulk. This usually happens when the original seal cracks, allowing water to get trapped behind it. Once mold roots into the silicone, bleach will only lighten it temporarily. The only permanent fix is to strip it out and recaulk.
When the Water Damage Goes Beyond the Caulk
If you remove your old caulk and discover spongy drywall, rotting wood framing, or cracked shower tiles, a tube of silicone won’t save you. When a minor DIY fix reveals major structural water damage, it is time to call in the professionals. Jazz Construction Group specializes in complete bathroom gut rehabilitations.
Schedule a Bathroom Remodel Consultation