Picture this: You just spent thousands of dollars transforming your lower level into a stunning home theater and guest suite. Two months later, a heavy spring rainstorm hits, and you walk downstairs to find your new luxury vinyl plank flooring floating in half an inch of murky water.
It is the ultimate homeowner nightmare, but it is entirely preventable. At Jazz Construction Group, we tell every client the same truth: A beautiful basement renovation is worthless if it isn’t built on a bone-dry foundation.
Before you hang a single sheet of drywall or pick out paint colors, you must ensure your space is sealed. Here is our comprehensive guide on how to waterproof your basement and protect your investment.

The Hidden Threat: Why Waterproofing is Non-Negotiable
Concrete is naturally porous. It acts like a giant sponge sitting in the damp earth. Even if you have never had standing water in your basement, moisture vapor constantly wicks through the foundation walls and floor slab.
If you frame walls and install insulation over damp concrete without a vapor barrier, you create a dark, humid cavity. Within weeks, toxic black mold will begin to grow behind your new drywall, ruining air quality and rotting the wood framing. Waterproofing is not just about stopping floods; it is about moisture management.
Step 1: The First Line of Defense (Exterior)
The best way to keep your basement dry is to stop water from ever reaching the foundation. Before looking inside, walk around the outside of your home during a rainstorm.
- Fix the Grading: The soil around your house should slope away from the foundation, dropping about 6 inches over the first 10 feet. If soil slopes toward your house, water will pool against the concrete.
- Extend Downspouts: Your roof collects hundreds of gallons of water during a storm. If your downspouts dump that water right next to the foundation wall, it will find its way inside. Extend your downspouts at least 5 to 6 feet away from the house.
- Clean the Gutters: Clogged gutters overflow, creating a waterfall effect directly over your foundation line.
Step 2: Interior Solutions (Managing the Water)
If exterior grading isn’t enough, or if the water table under your home is naturally high, you need an interior system to manage hydrostatic pressure (the force of water pushing up from under the floor).
| Waterproofing Method | How It Works | Best Use Case |
|---|---|---|
| Hydraulic Cement | A fast-setting compound used to fill visible cracks in concrete walls. Expands as it dries to form a watertight seal. | Minor wall cracks; localized damp spots. |
| Interior French Drain | A trench is cut around the perimeter of the basement floor, filled with a perforated pipe and gravel, and re-concreted. | Severe, consistent water seepage where the wall meets the floor. |
| Sump Pump System | Collects water from the French drain into a pit and actively pumps it outside, away from the house. | High water tables; homes prone to heavy spring flooding. |

Step 3: Vapor Barriers and Subfloors
Once the liquid water is managed, you must address the moisture vapor. This is a critical step in professional basement renovation design.
- Wall Vapor Barriers: Instead of traditional fiberglass batts, we often recommend closed-cell spray foam insulation against the concrete foundation walls. It acts as both an insulator and a 100% continuous vapor barrier, preventing condensation from forming behind your drywall.
- Dimpled Subfloor Mats: Never install flooring directly on concrete. We install dimpled plastic underlayment rolls (like DMX or Platon) on the floor before adding OSB or LVP. This creates a tiny air gap, allowing the concrete to breathe and keeping your finished floor warm and dry.
Frequently Asked Questions
How much does it cost to waterproof a basement?
Costs vary widely depending on the severity of the issue. Simple crack injections might cost $500, while installing a full interior perimeter French drain with a sump pump can range from $5,000 to $10,000+. Consider this an essential insurance policy for your renovation.
Do waterproof paints (like Drylok) actually work?
Waterproof masonry paints are a good temporary measure for very minor dampness, but they are not a permanent solution. Over time, hydrostatic pressure from outside will bubble the paint and push the water through. They should be used in combination with proper drainage, not as a replacement for it.
How do I know if my basement is too damp to finish?
Perform a simple tape test: Tape a 2ft x 2ft square of clear plastic to the bare concrete wall and floor. Leave it for 48 hours. If condensation forms on the inside of the plastic (touching the concrete), moisture is coming through the foundation and requires professional attention.
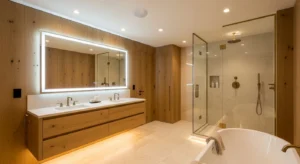
Protect Your Investment Before You Build
Don’t risk your dream basement on a wet foundation. At Jazz Construction Group, we ensure your space is properly sealed, insulated, and prepped for a lifetime of enjoyment. Explore our basement renovation services to see our start-to-finish process.
Book a Free Moisture Assessment